
Introduction
If you need to refresh your commercial building’s curb appeal without spending on costly renovations, a fresh coat of paint will work wonders. Not only does new paint beautify your commercial property, but it can also protect it against the elements, particularly the weather elements.
A new exterior paint job also prevents future surface issues, boosts your commercial property’s curb appeal, maintains its structural integrity, personalizes its look, and potentially increases its property value. Even energy-saving paints can help reduce your commercial property’s energy consumption.
It’s essential to be mindful of the temperature and weather in an exterior painting project. Too cold, wet, or hot weather can cause the paint to dry improperly, resulting in various issues, including adhesion problems, peeling, and cracking. Here at Custom Painting, Inc., we want to ensure your exterior painting project goes as smoothly as possible. That’s why we’ve put together this ultimate guide on how different weather conditions can influence your exterior paint’s drying times and other helpful tips.
Knowing weather conditions before exterior painting
Knowing and understanding weather conditions before painting exteriors is crucial to ensure the paint adheres properly and dries effectively. Here’s a guide to help you assess weather conditions:
- Temperature – Paint typically adheres best when applied in moderate temperatures. The optimal temperature range for painting varies depending on the type of paint, but generally, it’s between 50°F (10°C) and 85°F (29°C). Extreme temperatures can affect paint adhesion and drying times.
- Humidity – High humidity can cause paint to dry slowly and lead to issues like blistering and bubbling. Ideally, humidity levels should be below 50% for exterior painting. You can use a hygrometer to measure humidity levels.
- Wind – Windy conditions can affect paint application by overspray and uneven drying. Aim to paint on days with light to moderate winds. Strong gusts can also blow debris onto wet paint surfaces, resulting in imperfections.
- Rain – Painting should not be done if rain is expected within 24 hours. Moisture can interfere with paint adhesion and cause streaks or bubbles. Ensure the forecast predicts dry weather for at least a day after painting.
- Sunlight – Painting in direct sunlight can cause paint to dry too quickly, leading to issues like brush marks and lap marks. It’s best to paint in the morning or late afternoon when the sun is less intense. Also, avoid painting surfaces that are too hot to touch.
- Forecast – Check the weather forecast for your area to ensure several days of favorable conditions. Avoid painting if there’s a chance of rain, high winds, extreme temperatures, or high humidity.
- Surface conditions – Assess the surface you plan to paint. It should be clean, dry, and free of dust, dirt, or debris. Avoid painting surfaces that are damp or have recently been exposed to moisture.
- Primer and paint specifications – Follow the manufacturer’s recommendations regarding weather conditions for painting. Some paints may have specific temperature and humidity requirements for optimal performance.
- Shade plan – If possible, plan your painting schedule to take advantage of shaded areas or cloudy days, as these conditions can provide more favorable painting environments.
- Professional advice – If you’re unsure about weather conditions or how they might affect your painting project, consider consulting with a professional painter or paint manufacturer for guidance specific to your situation.
By considering these factors and planning your painting project accordingly, you can ensure a successful exterior paint job that withstands the elements and maintains its appearance over time.
Assessing your commercial property’s exterior
Importance of a thorough assessment
The passage of time, normal wear and tear, and the weather elements can leave marks on your commercial property’s exterior over time. By knowing the type of material on your commercial property’s exterior surface (wood, metal, vinyl, etc.) and thoroughly understanding the surface’s current state before painting it, you’ll be better equipped to address problems that may prevent a smooth and long-lasting paint job.
Identifying areas in need of repair
Depending on the size of your commercial property or the severity of the damage, inspecting its exterior surfaces for damage can take a while.
Before painting the exterior siding, thoroughly inspect and identify several areas that could affect the quality and longevity of the paint job in several ways:
- Know whether you have wood, vinyl, aluminum, stucco, or another type of siding. Doing so is crucial as it determines the kind of paint and preparation methods you’ll need.
- Check for any damage, such as cracks, rot, mold, mildew, or peeling paint. These issues need to be addressed before painting.
- Identify areas that need to be cleaned, sanded, or primed. All siding should be thoroughly washed to remove dirt, grime, and other contaminants.
- Look for gaps or cracks around windows, doors, and trim. These should be caulked and sealed to prevent moisture intrusion.
- Existing paint that is peeling or flaking off needs to be scraped away, and the surface sanded smoothly to ensure proper adhesion of the new paint.
- If you have metal siding or metal parts on your siding, check for rust stains that need to be treated before painting.
- Clean areas with mold or mildew growth with a mold-killing solution and allow them to dry completely.
- Identify areas that have been significantly weathered, as they may require a different type of primer or additional preparation.
- Pay special attention to trim, shutters, and other accent areas, as they may require a different color or type of paint.
- Before painting the entire house, it’s a good idea to paint a small section with your chosen color to ensure it’s what you want and to see how it looks in different lighting conditions throughout the day.
Taking the time to carefully inspect and prepare your commercial property’s exterior siding can make a big difference in the appearance and durability of your paint job. If you’re unsure how to prepare any part of your siding, consider consulting a professional painter.
To DIY or hire a professional painter?
Deciding between a DIY exterior paint job and hiring a professional involves considering several factors. Here’s a guide to help you make an informed decision:
Skill level and experience
- DIY – If you have experience with exterior painting, are familiar with the techniques required, and feel confident in your ability to complete the job with high quality, DIY might be a good choice.
- Professional – If you’re unsure about your painting skills, especially for tasks requiring detailed work and knowledge of different paint types and surfaces, hiring a pro is advisable.
Size and complexity of the job
- DIY – Small to medium-sized buildings or straightforward painting jobs might be manageable for a DIY project, especially if you have help.
- Professional – Large homes, multi-story buildings, or projects that involve complex surfaces, detailed trim work, or the need for significant prep work are best left to professionals.
Time commitment
- DIY – Consider if you have the time to dedicate to the project. Exterior painting can be time-consuming, especially with preparation work.
- Professional – Hiring professionals can save you time and hassle if you’re short on time or prefer the job to be completed quickly and efficiently.
Equipment and safety
- DIY – Assess whether you have the necessary equipment (ladders, scaffolding, paint sprayers, etc.) and can safely work on the exterior of your building, particularly at heights.
- Professional – Professionals have the right tools and equipment and are trained to work safely on ladders and scaffolding.
Cost
- DIY – A DIY project can save money on labor costs, but consider the investment in paint, equipment, and potential mistakes that might require fixing.
- Professional – Hiring a professional involves higher upfront costs but comes with the assurance of quality, efficiency, and a warranty for the work in many cases.
Quality and warranty
- DIY – The quality of a DIY job depends on your skills. Mistakes might require costly fixes.
- Professional – Professionals guarantee high quality and often provide warranties for their work, ensuring any issues are addressed without additional cost.
Making the decision
- Evaluate your skills and the scope of the project.
- Consider the time and equipment you have available.
- Assess your budget and how important the quality and longevity of the paint job are to you.
Ultimately, hiring a professional is the best choice if you’re looking for a high-quality finish, have safety concerns, or are dealing with a complex or large-scale project. A DIY approach could be satisfying and cost-effective if the project is smaller or less complex and you have the time and skills.
Responsibilities of the commercial property owners before exterior painting
You’ve decided to update your commercial property’s exterior with a new color scheme and hire a professional painting contractor to paint. You’re satisfied that leaving the job to the pros will save time, energy, and stress. But do you have any responsibility for the project?
In general, the answer is yes. Prepping a commercial space for painting is a big job. Before signing a contract, you should discuss with the contractor whether you can contribute to the project by doing the prep work before the paint crew arrives and how they should expect your commercial space to be left for them as they start painting.
Some contractors may include prep work elements in their job estimates or be willing to do it for an extra fee. That being said, here are a few tasks to keep in mind when preparing your commercial building for a professional paint job (not including surface preparation):
- Clearing the area – Ensure that the area around your commercial property is clear of obstacles and debris. Move any outdoor furniture, potted plants, or other items away from the walls to give painters easy access to the surfaces.
- Trimming vegetation – Trim back any bushes, shrubs, or trees that might touch or overhang the exterior walls. Doing so allows painters to reach all areas of the walls without obstruction.
- Turning off your sprinklers – If your sprinkler system has a set timer, turn it off before the crew arrives on painting day. You don’t want them to get soaking wet. Also, you don’t want some water drips or streaks landing in the paint finish.
- Keeping children and pets away (and cleaning after them) – Arrange to keep children and pets away from the work area. It ensures their safety and prevents any accidental disturbances to the painting process. If your pets or children leave some mess in the work area, clean up their waste and dispose of it properly.
- Protecting landscaping and features – Cover any plants, flowers, or other landscaping features you want to protect from paint splatter or damage. Use drop cloths or plastic sheeting to cover these items.
- Communicating with painters – Communicate with the painting professionals about any specific instructions or concerns you have regarding the painting process. Doing so ensures that both parties are on the same page and helps to avoid misunderstandings.
While the painting professionals will handle the actual painting process, taking care of these preparatory tasks can help ensure that the job goes smoothly and results in a high-quality finish. It is also a great way to save more money while still getting the benefits of a professional paint service.
Gathering the necessary materials and tools
Materials
The quality materials for exterior painting ensure durability, long-lasting protection against weather elements, and an attractive appearance. Here is a list of essential materials and products:
- High-quality exterior primer
- High-quality exterior paint
- High-quality exterior caulk
- High-performance wood hardener
- Exterior-grade adhesive, depending on the type of surface you work on
- Patch filler, wood filler, or epoxy, depending on the type of surface you work on
- Mildewcide (for wet or humid areas or if the exterior surface has been previously affected by mold or mildew)
- Paint strippers or removers
- Detergent or surface any cleaning agent
Tools
Gather quality tools for your exterior painting project. It can make the job easier and ensure a smoother, more professional finish. Here’s a list of recommended tools:
- Power washer or pressure washer
- Scrapers and putty knives
- Sanding tools (use any):
- Sandpaper
- Sanding block
- Electric sander
- Caulking gun
- Paint application tools (use any of the three when applicable)
- High-quality paint brushes
- High-quality paint rollers and extension poles
- Paint sprayer
- Ladder or scaffold
- Drop cloths
- Plastic sheeting
- Painter’s tape
- Paint bucket and grid
- Safety gear:
- Goggles or safety glasses
- Gloves
- Dust mask or respirator
- Coveralls
- Hard hats
- Fall arrest systems such as harnesses and carabiners if working at heights
Cleaning the exterior surfaces
Cleaning exterior surfaces before painting is essential for ensuring the paint adheres properly and lasts longer. Here are the steps to prepare exterior surfaces for painting (excluding priming, in case a professional crew will do it):
- Inspect the surface – Before starting, inspect the surface for any signs of damage, such as cracks, holes, or rot. Repair any damage you find. This step is crucial for preventing future problems.
- Wash the surface – Use a pressure washer or a hose with a suitable nozzle to remove dirt, dust, and loose paint. A pressure washer is particularly effective for cleaning exterior surfaces, but be careful not to damage the surface with too high a pressure.
- Apply cleaning solution – For areas with mildew, mold, or stubborn stains, apply a cleaning solution. You can use a mixture of water and bleach (1 part bleach to 3 parts water) or a commercial exterior cleaning product. Apply the solution with a sprayer or a sponge, following the product’s instructions.
- Scrub the surface – Use a stiff brush or scrubbing pad to scrub the surface thoroughly. Pay special attention to areas with heavy staining or mold. Be gentle on softer surfaces to avoid damage.
- Rinse thoroughly – After scrubbing, rinse the surface thoroughly with clean water. Ensure cleaning solution and loosened dirt are completely washed away. A pressure washer can also be effective for this step, but again, be cautious of the pressure.
- Allow to dry – Let the surface dry completely before proceeding with painting. Depending on the weather and exterior surface type, this action may take a day or more. Moisture trapped beneath the paint can lead to problems like peeling and bubbling.
- Sand rough areas – Once dry, sand any rough areas to create a smooth surface for painting. Use sandpaper or a sanding block, and wear a mask to avoid inhaling dust.
- Remove sanding dust – After sanding, remove all dust from the surface using a brush, cloth, or blower. Clean surfaces ensure better paint adhesion.
- Tape off areas – Use painter’s tape to protect areas you don’t want to paint, such as window frames, door frames, and light fixtures.
If you’re using a pressure washer, here are the following steps:
- Choose the right equipment (preferably a pressure washer with adjustable settings).
- Test the pressure on an inconspicuous area to ensure it won’t damage the surface.
- Use the correct nozzle for the job: a wide-angle nozzle for less powerful and better for more delicate surfaces or a narrower nozzle for more powerful cleaning on harder surfaces.
- Before power washing, apply detergent or any cleaning solution to areas with tougher stains.
- Keep the nozzle away from the surface while washing (preferably 12 to 18 inches) to prevent damage.
- Wash from the top down.
- Overlap strokes as you wash to prevent streaks and ensure even cleaning.
- Once pressure washing is done, allow the surface to dry completely before proceeding to other preparation steps.
Making repairs
Repairing exterior siding before painting is essential to ensure a smooth, durable finish that protects your building from the elements. Here’s a step-by-step guide on how to do it:
- Inspect and clean – Inspect the siding for any damage, mildew, or dirt. Use a soft brush or pressure washer (on a low setting) to clean the siding thoroughly. Allow it to dry completely.
- Remove loose paint – Scrape any flaking or peeling paint with paint scraper. For larger areas, you might use a power sander. Be sure to wear protective gear to avoid inhaling dust.
- Repair damages:
- For wood siding – Replace any rotted or severely damaged boards. Fill smaller holes or cracks with exterior-grade wood filler. Sand the filled areas smooth once dry.
- For vinyl siding – Seal small cracks with caulk. If there are larger damaged areas, you might need to replace entire sections of the siding.
- For aluminum siding – Fill dents with an auto body filler. Sand the area smoothly after it dries.
- Sand rough areas – Smooth any rough spots with sandpaper or a power sander. This step is crucial for achieving a uniform surface that paint can adhere to properly.
- Caulk gaps – Use exterior-grade caulk to fill gaps between the siding and trim or around windows and doors. This step helps prevent moisture from getting behind the siding.
- Prime the surface – Apply a high-quality exterior primer to bare wood or filled areas. This step is essential to ensure good paint adhesion and prevent stains from bleeding through the new paint.
- Address mildew – If you notice mildew during your inspection, apply a solution of one-part bleach to three parts water to the affected area. Wear protective gear and rinse the area thoroughly afterward.
- Tape off areas – Use painter’s tape to protect windows, doors, and trim from paint.
- Check the weather – Ensure the forecast is clear for the next few days. High humidity, rain, or extreme temperatures can affect paint drying and adherence.
Replacing damaged materials
If some sections of your siding are severely damaged, which renders simple repairs impossible, the best option is to seek the help of a professional contractor. In the case of wood rot, for example, a team of experts will assess the damage, find its root cause to address it to ensure the rot will never occur again, and replace the entire damaged section with new wood.
Sanding and scraping
Techniques for removing old paint and smoothing surfaces
Scraping old and damaged paint and smoothing the exterior surface before repainting is essential for achieving a professional and long-lasting finish. Here’s a comprehensive guide to help you through the process:
Step 1: Scrape old paint
- Safety first – Wear safety goggles, a dust mask or respirator, and protective clothing to protect yourself from dust and lead-based paint chips, which are common in homes and commercial buildings built before 1978.
- Scrape loose paint – Remove all loose and peeling paint using a paint scraper. Be gentle to avoid gouging the wood or other surface materials.
- Wire-brush leftover paint – After scraping, use a wire brush to remove any remaining loose paint and to roughen up glossy surfaces for better adhesion of the new paint.
Step 2: Smoothing the surface
- Repair cracks and holes – Fill any cracks, holes, or imperfections with spackling paste or an exterior-grade filler using a putty knife. Follow the product instructions for drying or curing times.
- Sand repaired areas – Once the filler has dried, sand the repaired areas with fine-grit sandpaper to ensure a smooth, flush finish with the surrounding surface.
- Clean up – Remove all dust and debris from the sanding process with a brush or damp cloth. Ensure the surface is clean and dry before proceeding.
Following these steps allows you to prepare your exterior surfaces for priming and painting, ensuring a smooth and durable paint job that will look great and last for years.
Safety precautions for sanding and scraping
Safety is crucial when scraping old paint and sanding exterior surfaces in preparation for new paint, especially if dealing with lead-based paint, commonly used before 1978 in the United States. Here are key safety precautions to consider:
- Lead safety – If your commercial property was built before 1978, there’s a good chance it might have lead-based paint. Before you start, test for lead paint, and if present, consider hiring a certified lead abatement contractor. The U.S. Environmental Protection Agency (EPA) has strict guidelines for handling lead-based paint.
- Personal protective equipment (PPE):
- Respirator: Use a NIOSH-approved respirator that filters out dust and toxic particles, especially if sanding or scraping old paint.
- Gloves: Wear heavy-duty gloves to protect your hands from sharp edges and chemicals.
- Goggles: Protect your eyes from dust and debris with safety goggles.
- Coveralls: Wear disposable coveralls or old clothing to protect your skin from dust and paint particles.
- Dust control:
- Wet sanding and scraping: This method helps minimize airborne dust. Keep the surface wet to reduce the spread of lead dust if dealing with lead-based paint.
- Containment: Use plastic sheeting to contain the area where you’re working to prevent the spread of dust and debris to other parts of the property.
- HEPA vacuum: Use a HEPA vacuum to thoroughly clean up dust and debris. Regular vacuums can’t capture the fine particles and may spread them further.
- Proper ventilation:
- Work in a well-ventilated area to ensure that dust and chemical fumes are dispersed. If working indoors, use fans and open windows to maximize airflow.
- Safe disposal:
- Follow local regulations to dispose of lead-based paint debris and other hazardous materials. Seal and label waste bags properly.
- Avoid heat guns and open flame:
- High temperatures can release toxic fumes, especially from lead-based paint. Avoid using heat guns above 1100°F or open flames for paint removal.
- Wash and clean:
- After finishing work, wash your hands and face thoroughly before eating or drinking. Shower and change into clean clothes to prevent spreading dust around your worksite.
- Notify and protect others:
- Inform your neighbors about your project to help minimize their exposure to dust and fumes, especially if lead-based paint is involved.
- Professional assistance:
- For extensive projects or if lead-based paint is present, consider hiring professionals who are trained and certified in safe removal practices.
Taking these precautions seriously can help you safely prepare your exterior surfaces for new paint while protecting your health and the environment.
Priming your commercial building’s exterior
The benefits of using a primer
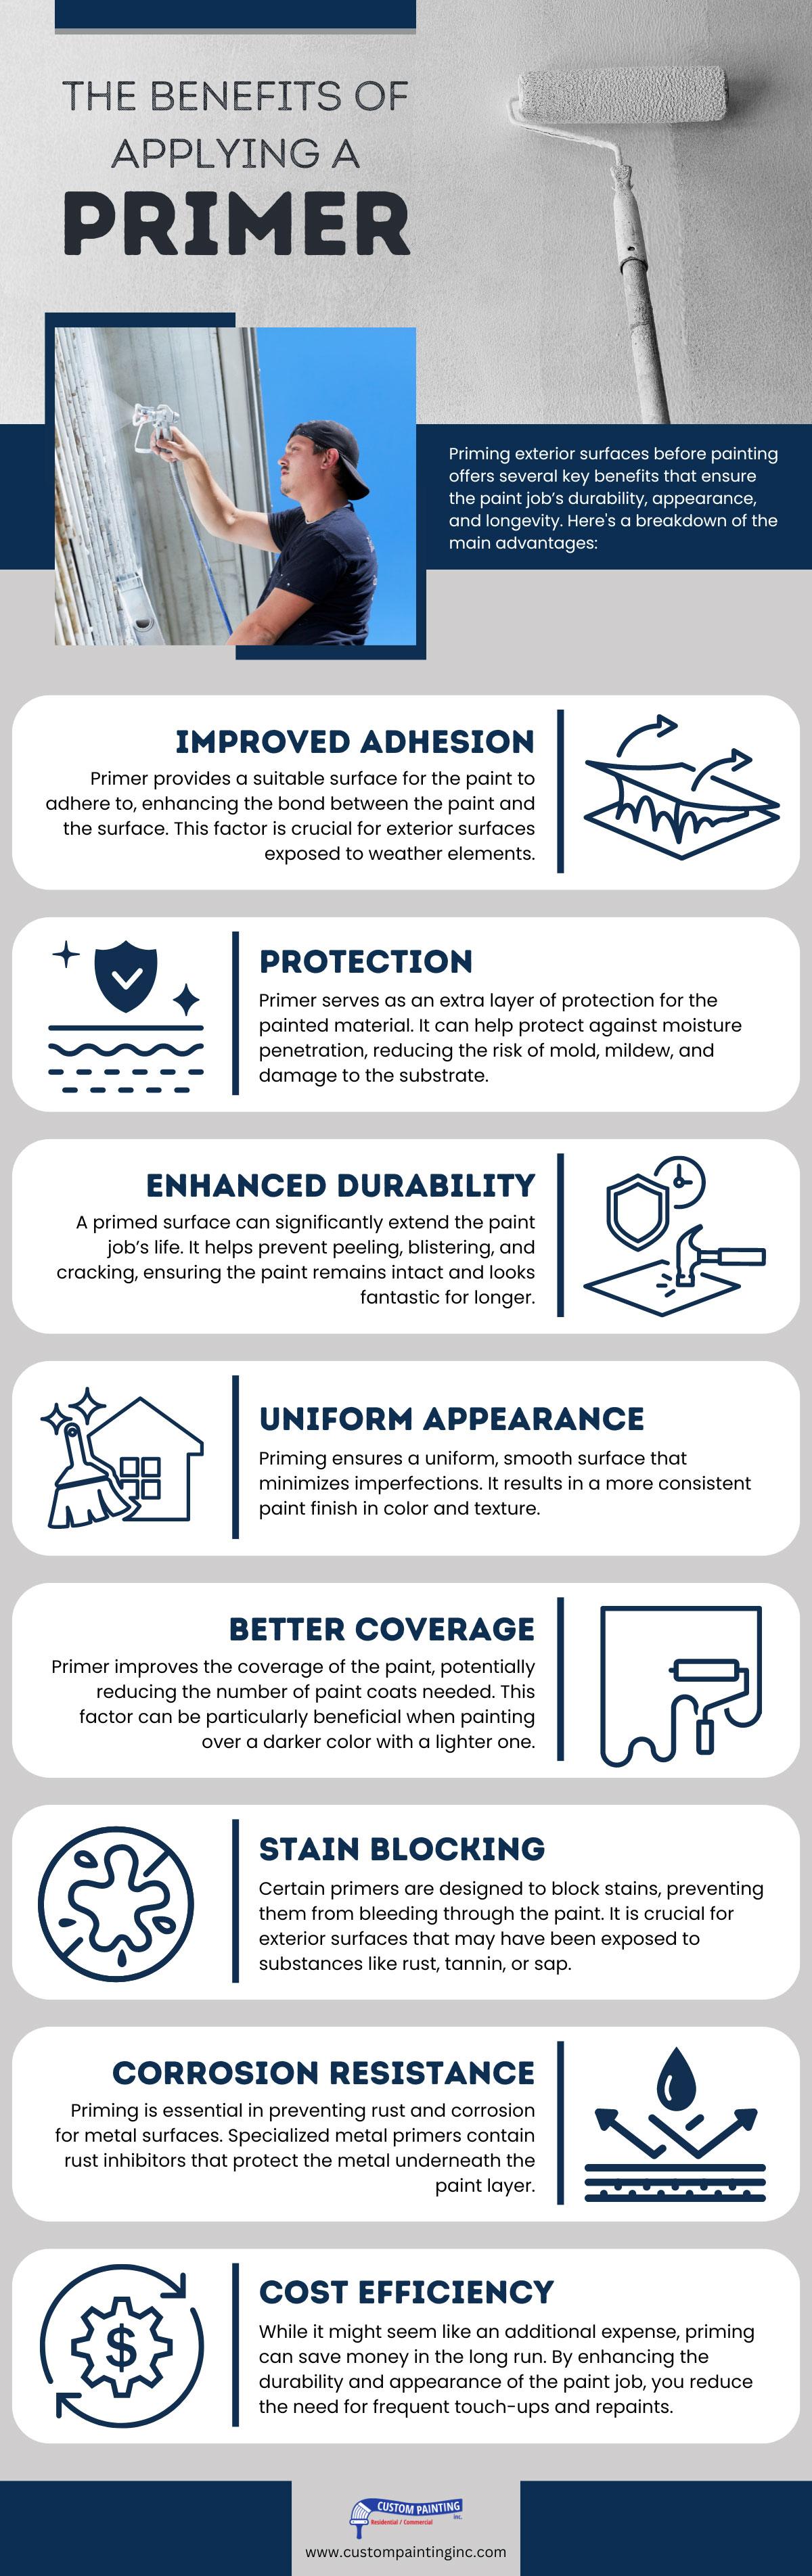
Using a primer before painting offers several benefits:
- Improved adhesion – Primers help the paint to adhere better to surfaces, reducing the likelihood of peeling and flaking.
- Enhanced durability — A primer can increase the paint job’s durability, making it last longer.
- Uniform appearance – Primers ensure a more uniform and smooth appearance by minimizing surface imperfections.
- Better coverage – They can improve the coverage of the paint, reducing the number of coats needed.
- Color optimization – Primers can help achieve the paint’s true color, especially when painting over a darker color.
- Moisture protection – Some primers provide a moisture barrier, preventing surface water damage, especially in bathrooms and kitchens.
- Stain blocking – They can block stains and prevent them from bleeding through the paint, ensuring a cleaner finish.
- Corrosion resistance – Primers can offer rust and corrosion resistance for metal surfaces.
Selection criteria for the right type of primer
Selecting the correct primer for exterior painting is crucial for achieving a durable and visually appealing finish. Here are the main factors to consider:
- Surface material – Different materials require specific primer types. For example, wood, metal, and masonry each have primers formulated to best adhere to and protect their surfaces.
- Condition of surface – For surfaces with issues like peeling, cracking, or mildew, a primer that addresses these problems is necessary. There are primers designed to seal, bond, or resist mildew.
- Paint compatibility – Ensure the primer is compatible with the type of paint you plan to use. Water-based (latex) and oil-based paints sometimes require different types of primers.
- Weather resistance – Exterior primers should be capable of withstanding the local climate, including resistance to UV rays, moisture, temperature changes, and other environmental factors.
- Color of topcoat – Using a tinted primer closer to the color of the topcoat can enhance color coverage and reduce the number of topcoat layers needed.
- VOC content – Consider the volatile organic compound (VOC) content for health and environmental reasons. Low-VOC or VOC-free primers are available.
- Manufacturer recommendations – Follow the paint manufacturer’s recommendations for the best results, as some primers and paints are formulated to work together.
Choosing the right paint
Factors to consider in choosing paint
Choosing the right paint for your exterior project involves considering the surface, its environment, and the look and durability you aim for. Here’s a simplified guide on how to select the appropriate paint, followed by a list of common paint types and their advantages:
- Identify the surface – Determine whether you’re painting interior or exterior surfaces and what material those surfaces are made of (wood, drywall, metal, etc.).
- Consider the environment – High-moisture areas like bathrooms or exteriors exposed to harsh weather require paints with specific characteristics for durability.
- Finish and aesthetics – Decide on the sheen level (matte, eggshell, satin, semi-gloss, gloss) based on the desired aesthetic and practicality. Higher gloss levels are easier to clean but may highlight imperfections.
- Durability and maintenance – Some paints are more durable and easier to clean, making them ideal for high-traffic areas.
Paint types and their advantages
Choosing the correct paint for exterior painting involves balancing these advantages with your specific needs and preferences for your project. Here are some paint types and their advantages:
- Water-based paints (latex)
- Advantages: Quick drying, low VOCs (volatile organic compounds), easy clean-up with water, flexible finish resistant to cracking, good color stability, and environmental friendliness.
- Oil-based paints (alkyd)
- Advantages: Durable, good for high-moisture areas, superior adhesion, smooth finish, and longer drying time allows for a smoother application.
- Acrylic paint
- Advantages: A type of water-based paint known for its quick drying time, resistance to fading, flexibility, and ability to adhere to a wide range of surfaces.
- Enamel paint
- Advantages: Hard, durable finish, resistant to moisture and wear, making it ideal for trim, cabinets, and outdoor surfaces. Available in both oil-based and water-based formulas.
- Latex enamel paint
- Advantages: Combines the durability of traditional enamel paint with the ease of use of latex paint, making it suitable for various surfaces, including interior and exterior walls.
- Chalk paint
- Advantages: Requires minimal surface preparation, provides a matte finish, and can be easily distressed for a vintage look. Ideal for furniture and decorative pieces.
- Milk paint
- Advantages: Eco-friendly, non-toxic, provides a unique, rustic finish that is ideal for antique furniture and decorative pieces. It’s biodegradable and comes in powder form to be mixed with water.
- Epoxy paint
- Advantages: Extremely durable, resistant to chemicals, stains, and moisture. It is commonly used on concrete floors, countertops, and other high-wear surfaces.
Challenges of painting a commercial building’s exterior
Painting a commercial building’s exterior comes with several common challenges, including:
- Weather conditions – Paint application requires specific temperatures and dry conditions. Weather can be unpredictable, affecting scheduling and drying times.
- Surface preparation – Properly preparing the surface, which may involve cleaning, sanding, and repairing flaws, is critical but time-consuming.
- Taller buildings– Reaching high or hard-to-access areas in taller commercial buildings require ladders, scaffolding, or lifts. It adds complexity and risk to the painting process.
- Choosing the right paint – The appropriate paint and finish for the building’s exterior material is crucial for durability and aesthetics.
- Dark-colored walls – When exposed to direct sunlight and higher temperatures, dark colors absorb heat and suffer from moisture issues than lighter shades. And because dark colors fade faster, they’re more difficult to touch up. In contrast, lighter shades fade less and last longer on exterior walls.
- Mold and mildew – Buildings located in damp and humid regions or parts of a siding that lack exposure to sunlight are susceptible to mold and mildew.
- Safety concerns – Painting often involves working at heights, requiring ladders or scaffolding, which poses safety risks. Paint drips and spills can cause
- Access issues – Reaching all parts of a building’s exterior, especially in multi-story buildings, can be challenging.
- Time and labor – Exterior painting is labor-intensive and can take longer than anticipated, especially with larger buildings or those with intricate details.
- Environmental regulations – There may be regulations regarding the types of paint and solvents you can use, especially in areas with strict environmental protection standards.
- Budget – High-quality materials and professional labor can be costly, and unexpected issues may increase the budget.
Planning your painting project

The best practices for timing and sequencing your exterior paint job
Timing and sequencing your exterior paint job requires careful planning to achieve the best results. Here are some best practices:
- Choose the right time of year – Aim to paint during moderate weather conditions with temperatures between 50°F to 85°F (10°C to 29°C). Avoid painting in extreme heat or cold, as it can affect the paint’s adhesion and drying.
- Check weather forecasts – Monitor weather forecasts for the days leading up to and during the painting process. Avoid painting if rain or high winds are forecasted within 24-48 hours, as it can affect the paint’s application and drying.
- Prepare the surface – Clean the exterior walls thoroughly before painting to remove dirt, debris, and mildew. Repair cracks, holes, or damaged areas, and sand rough surfaces to ensure smooth paint application.
- Prime bare surfaces – If painting over bare wood or metal, apply a primer before painting to improve the adhesion and durability of the paint.
- Start early in the day – Begin painting early to take advantage of cooler temperatures and optimal drying conditions. Avoid painting in direct sunlight, as it can cause the paint to dry too quickly and result in uneven coverage.
- Work in sections – Divide the exterior into manageable sections and complete one section at a time. Start at the top and work your way down to ensure that any drips or spills are covered as you progress.
- Allow sufficient drying time – Follow the manufacturer’s instructions for drying times between coats. Typically, you should allow at least 24 hours for each coat to dry before applying the next coat.
- Plan for multiple days – Depending on the size of the project and the number of coats required, plan for several days to complete the painting process. Avoid rushing the job, which can lead to mistakes and poor results.
- Touch-up and clean-up – Inspect the surface for any missed spots or imperfections once the final coat is applied and dried. Touch up as needed and clean up any paint spills or drips promptly.
- Regular maintenance – After completing the paint job, schedule regular maintenance to keep the exterior looking its best. This may include washing the surface periodically and touching up any areas that show signs of wear or damage.
How long does it take to prepare a building’s exterior before painting?
The average time range is 16 to 24 hours, depending on the size of the building and the number of repairs needed.
How long does it take to paint a commercial building’s exterior?
The usual answers will be:
- 1,000 to 1,400 square feet for 2 to 3 days
- 1,800 to 2,100 square feet for 4 to 6 days
Custom Painting, Inc. has painted a 5,600-square-foot home and a 30,000-square-foot or larger warehouse. Our crew tackles each large project in sections so as not to disturb anyone for a long period.
Considerations for weather and time of the year
The best time for exterior painting is in mild weather, typically in spring, late summer, or early fall, depending on your location. Temperatures from 50°F to 90°F are the most ideal for exterior painting. On the other hand, extreme temperatures and high humidity can affect the paint’s drying process.
Given California’s diverse weather patterns, the best time of year to do exterior painting mostly depends on your climate zone. But for most of the state, the best times are during the late spring, summer, and early fall. Generally, these periods have the most favorable weather conditions for exterior painting, with moderate temperatures and minimal rain.
Conclusion
Surface preparation is not an option but a requirement for every paint job. Cleaning the surface removes dirt, grease, and mildew. When the surface is cleaned, it allows required repairs of damaged areas to attain a clean, smooth surface for the finishing paint to adhere to properly.
Understanding weather conditions such as temperature, humidity, rain, and wind ensures proper paint application, adhesion, and finish quality during exterior painting projects.
Address the common challenges in exterior painting, such as weather conditions, paint selection, and safety concerns, by careful planning, patience, and attention to detail. Professional residential painters have the skills, experience, tools, and materials to deal with these challenges efficiently and effectively, making them valuable for anyone looking for high-quality house painting services.
Custom Painting, Inc. offers professional painting, repairs, and decorative services for residential and commercial properties in the Bay Area. We have served the region for over 40 years, helping homeowners and commercial property owners give their spaces a fresh and updated look. Our team of licensed and insured paint and construction experts works with the highest quality standards and unparalleled customer service.
To learn more about paint, carpentry, repairs, and custom installation services, call Custom Painting at 510-795-0903 or complete the online form to schedule an appointment. We always provide job estimates for free! You can count on us for all your painting, repair, and makeover needs.